Services overview
A service is a reusable endpoint definition registered in the config builder. Services play different roles depending on their type — some are referenced live by layers at runtime, others are purely a convenience for finding data while you build the config.
Follow along
Screenshots on this page were taken with the Comprehensive demo config loaded.
How services are used
Services fall into three categories:
| Service type | Role | What gets saved in the config |
|---|---|---|
| WMS / WMTS / WFS | Live endpoint reference. The chosen layer from the service is the data source. | The service URL plus the chosen layer name. Edit the URL once and every layer that uses it re-points. |
| STAC catalogue / S3 bucket | Discovery aid in the builder only. Lets you browse the catalogue/bucket to find COG, GeoJSON, FlatGeoBuf, or CSV assets. | The resolved direct URL of each picked file. The catalogue/bucket entry is not needed at runtime — you can delete it after layers are configured without breaking them. |
| STAC collection (coming soon) | Live reference to a STAC collection as the data source — for example, to feed a time series into the temporal control. | The collection URL. |
What a service captures
A service entry stores three things:
- The type of endpoint (WMS, WMTS, WFS, STAC catalogue, or S3 bucket).
- The URL to reach it.
- A name you choose, used in dropdowns when you build layers.
For OGC services and STAC catalogues, the builder performs automatic
discovery — GetCapabilities for OGC and catalogue metadata for STAC —
and populates the service name for you.
Where services live
The Services tab lists every service in the current config. The header of the Configured Services card has three buttons:
| Button | Purpose |
|---|---|
| Re-check all | Re-runs validation against every service (STAC, OGC, S3). Useful after editing endpoints. |
| Add Recommended Services | Bulk-adds a curated list of common public services. See Recommended services. |
| Add Service | Opens the Add Service dialog. See Adding services. |
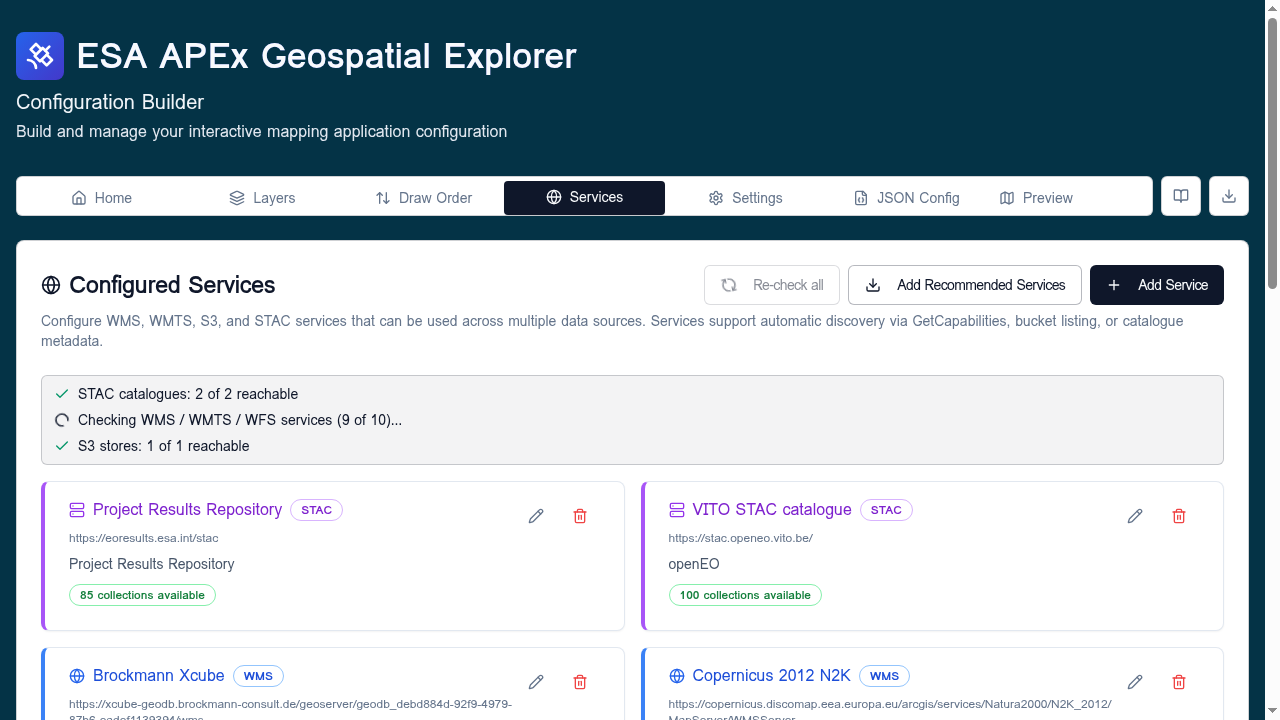
Below the header, each service is shown as a row with its name, URL, type badge, and per-service validation status.
Supported service types
| Type | Used for | Discovery |
|---|---|---|
| WMS | Map images served per request from a WMS endpoint. | GetCapabilities |
| WMTS | Pre-tiled raster pyramids. | GetCapabilities |
| WFS | Vector features served from a WFS endpoint. | GetCapabilities |
| STAC | Catalogues of imagery and assets. | Catalogue root metadata. |
| S3 | Public/private S3 buckets containing COG, GeoJSON, FlatGeoBuf, or CSV files. | Bucket listing. |
| JSON or XML upload (beta) | One-off ingest of a saved capabilities or catalogue document. | n/a |
Direct-URL data sources (a single COG, GeoJSON, FlatGeoBuf, XYZ, or CSV file) do not need a service entry — you can add them straight from the Layers tab.
Validation states
Each service shows one of:
- OK — reachable, returned a valid response.
- Checking… — a re-check is in flight.
- Failed — could not reach the endpoint, or the response was unusable. The error message is shown inline.
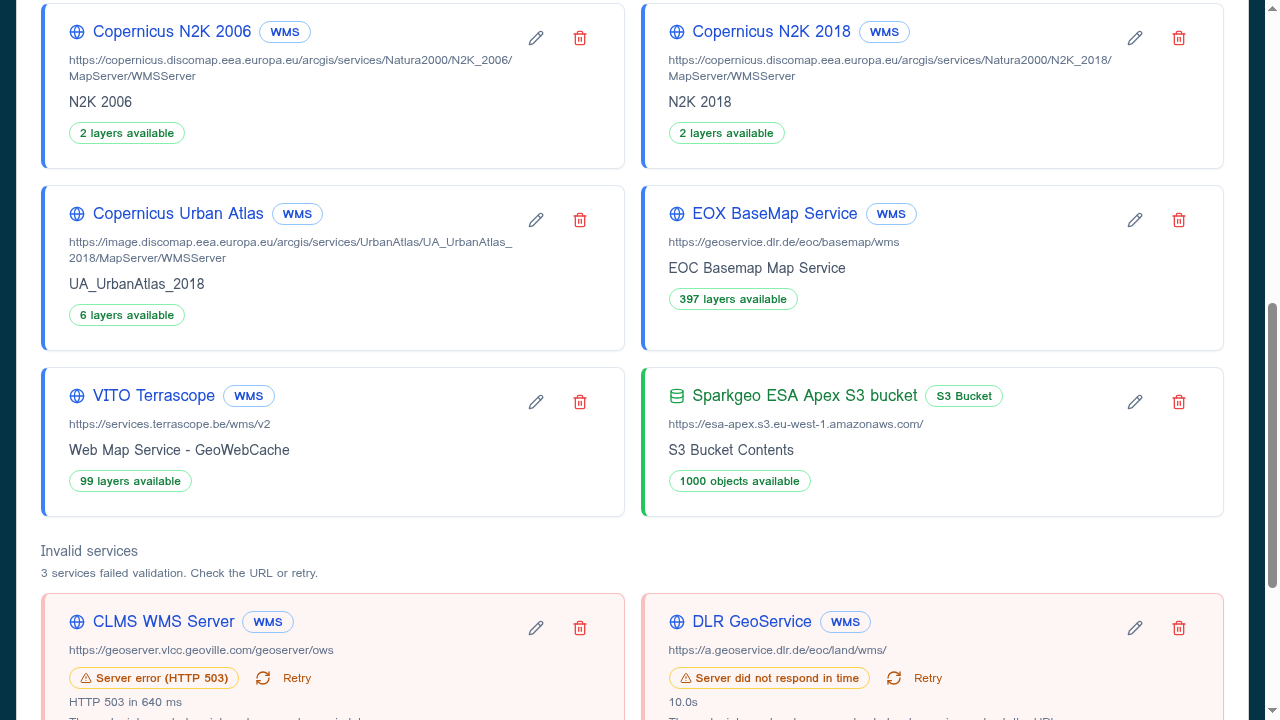
Use Re-check all after a network change or when you suspect an upstream endpoint has moved.
When to use services vs. direct URLs
- For WMS / WMTS / WFS, always use a service — it is the only way to point a layer at that kind of endpoint, and editing the URL re-points every layer that references it.
- For STAC catalogues and S3 buckets, add a service when you want to browse the catalogue/bucket from the builder UI to find assets. Once the layers are configured, the resolved file URLs are what live in the config — the service entry can be removed later without affecting those layers.
- Use a direct URL when the layer is a single standalone file (a one-off COG, GeoJSON, FlatGeoBuf, CSV, or XYZ tile pattern) and you do not need the browser UI to find it.
Next steps
- Adding services — walk-through for adding each type.
- Recommended services — bulk-import the curated list.
- Run Healthcheck — validate every service plus every layer.