Settings overview
The Settings tab holds top-level configuration that applies to the whole APEx Geospatial Explorer instance: export filename, design variant, navigation defaults, custom Coordinate Reference Systems (CRS), branding, footer links, and URL parameters reference.
Follow along
Screenshots on this page were taken with the Comprehensive demo config loaded. Load it from Home → Load → Examples → Comprehensive demo to reproduce them.
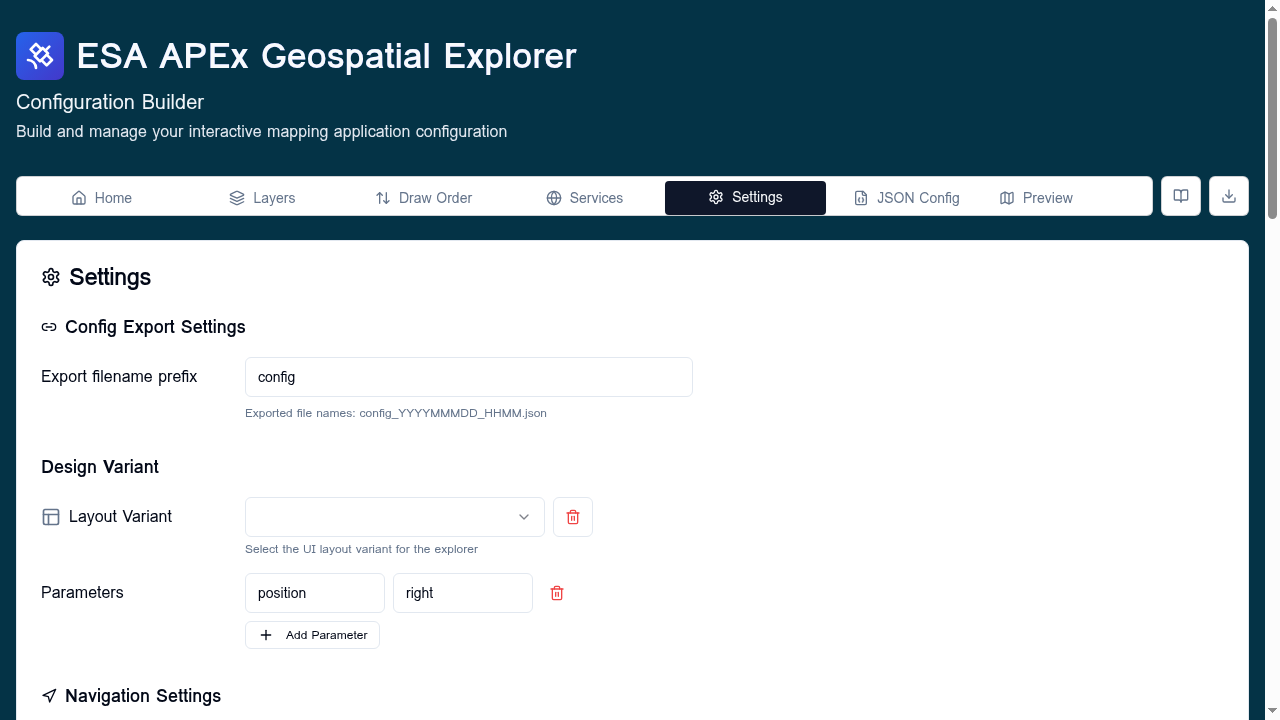
The tab is one long card, organised into subsections. Each subsection is covered below.
Config Export Settings
- Export filename prefix — the prefix used when you click Export on
the Home tab. Exported filenames follow the pattern
<prefix>_YYYYMMDD_HHMM.json. Pick something short and meaningful, for exampleconfig_biodiversity→config_biodiversity_20251114_1530.json.
For sort order and field-ordering options at export time see Export options.
Design Variant
Pick one of the predefined UI variants for the deployed Explorer (for
example, full-screen vs. side-panel layouts). The choice is persisted in
the config's layout.design field. See Layout for the visual
differences between variants.
Navigation Settings
Set the map's initial state.
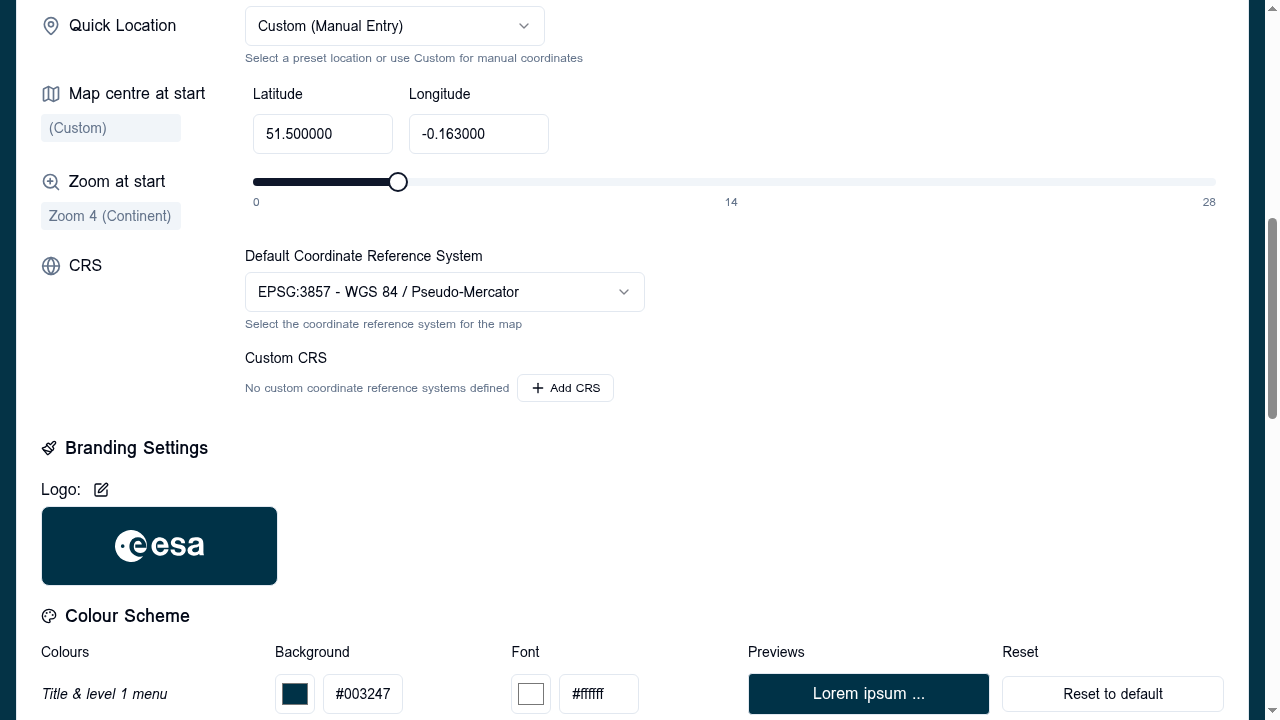
Quick Location
Pick a preset region from the dropdown:
- Custom (Manual Entry) — type your own latitude/longitude.
- Global & Continents — world view and continental presets.
- Major countries — country-level presets.
Picking a preset fills the Map centre and a sensible Zoom for that scale.
Map centre at start
Latitude (−90 to 90) and Longitude (−180 to 180). Both fields validate as you type and show a tooltip when out of range. Switches to "(Custom)" when you edit the values manually.
Zoom at start
A slider from 0 (whole world) to 28 (street level). The current zoom level is shown alongside; hover for the level number. The OpenLayers reference markers at 0, 14, and 28 are shown under the slider.
CRS (Coordinate Reference System)
Two controls:
- Default Coordinate Reference System — the CRS the map uses on load. Pick from the built-in list (EPSG:3857, EPSG:4326, common polar and national grids) or any custom CRS you have added.
- Custom CRS — list of project-defined CRSes shown as removable pills. Click + Add CRS to register a new one (proj4 definition required). See Projections / CRS management — managed inline here.
Adding a custom CRS opens a dialog asking for an EPSG-style code and a proj4 string. Once added, it becomes available in the Default CRS dropdown and to every layer in the config.
Branding Settings
Logo
Click the pencil icon next to Logo: to edit. Paste an image URL (SVG recommended) and click Save. The preview swatch shows the logo against your primary background colour.
Colour Scheme
A grid lets you set three colour pairs that drive the deployed Explorer's chrome:
| Row | Background | Font | Used for |
|---|---|---|---|
| Title & level 1 menu | Primary background | Primary font | Header bar, top-level tabs |
| Level 2 menu | Background | Secondary font | Sub-navigation |
| Panel | Secondary background | — | Side panels, modals |
Each row has a hex colour picker plus a text input. The Previews column shows what the resulting combination looks like. Reset to default restores the original brand colour for that slot.
For finer control, click View / edit full colour palette to open the advanced colour scheme dialog (CSS custom properties, hover/active states, borders, etc.).
Footer Links
A live preview of the current footer links is shown as badges (with mail or external-link icons depending on URL scheme). Click Edit Footer Links to open the Footer Links editor, which supports per-page link sets.
URL Parameters
A reference table of query-string parameters the deployed Explorer accepts
to override the config at load time (for example ?variant=fullscreen,
?center=..., ?zoom=..., ?layers=...). For the canonical reference see
URL parameters.