COG (Cloud Optimized GeoTIFF)
A COG is a single GeoTIFF file laid out so that the APEx Geospatial Explorer can stream just the tiles it needs over HTTP. COGs are the preferred raster format for the builder.
When to use
- Single-band or multi-band rasters served from object storage (S3, MinIO, OBS, Azure Blob via HTTPS).
- DEMs, classification maps, indices, hyperspectral cubes, RGB composites.
- Anywhere you would otherwise need a tile service but only have a static file.
Add a COG
Open a Layer Card → Datasets → Add Dataset. The default Source Type is Direct Connection and the default Data Format is COG.
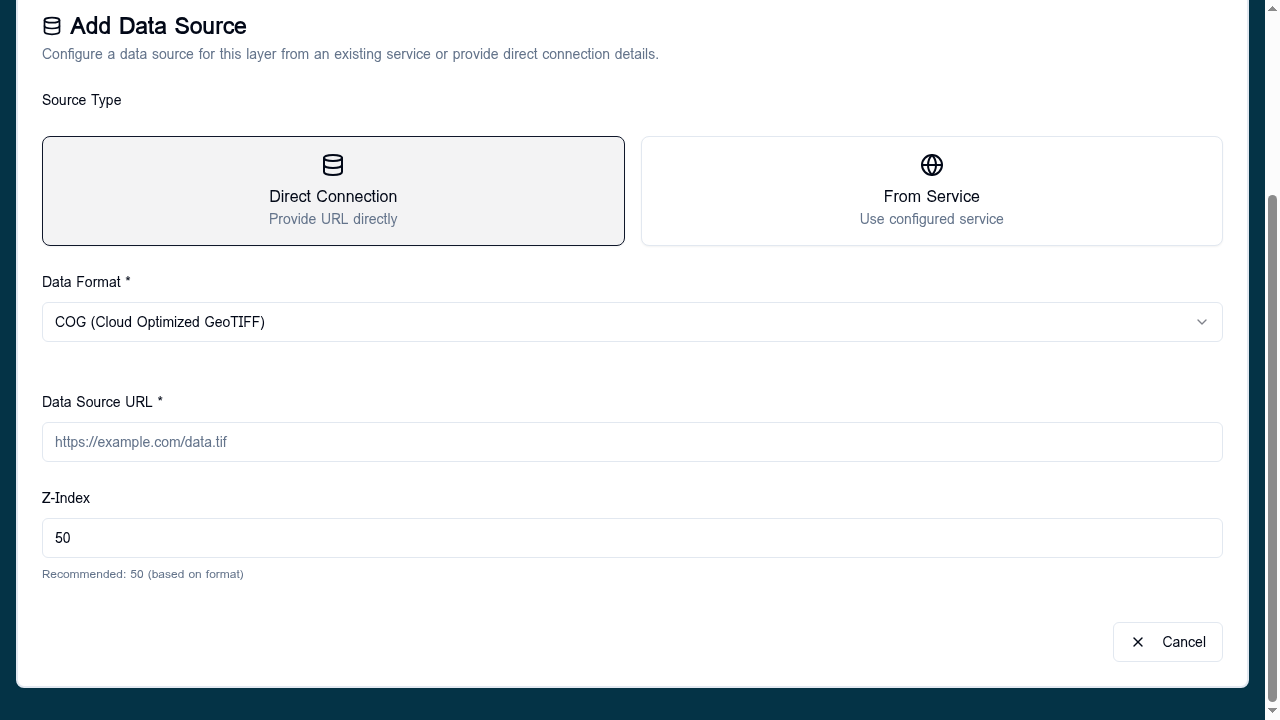
| Field | What to fill in |
|---|---|
| Source Type | Direct Connection for a single COG; From Service if it lives inside a configured S3 service. |
| Data Format | COG (Cloud Optimized GeoTIFF). |
| Data Source URL | Public HTTPS URL ending in .tif/.tiff. |
| Z-Index | Stacking hint, default 50. Leave it unless you know you need to override it. |
From an S3 service
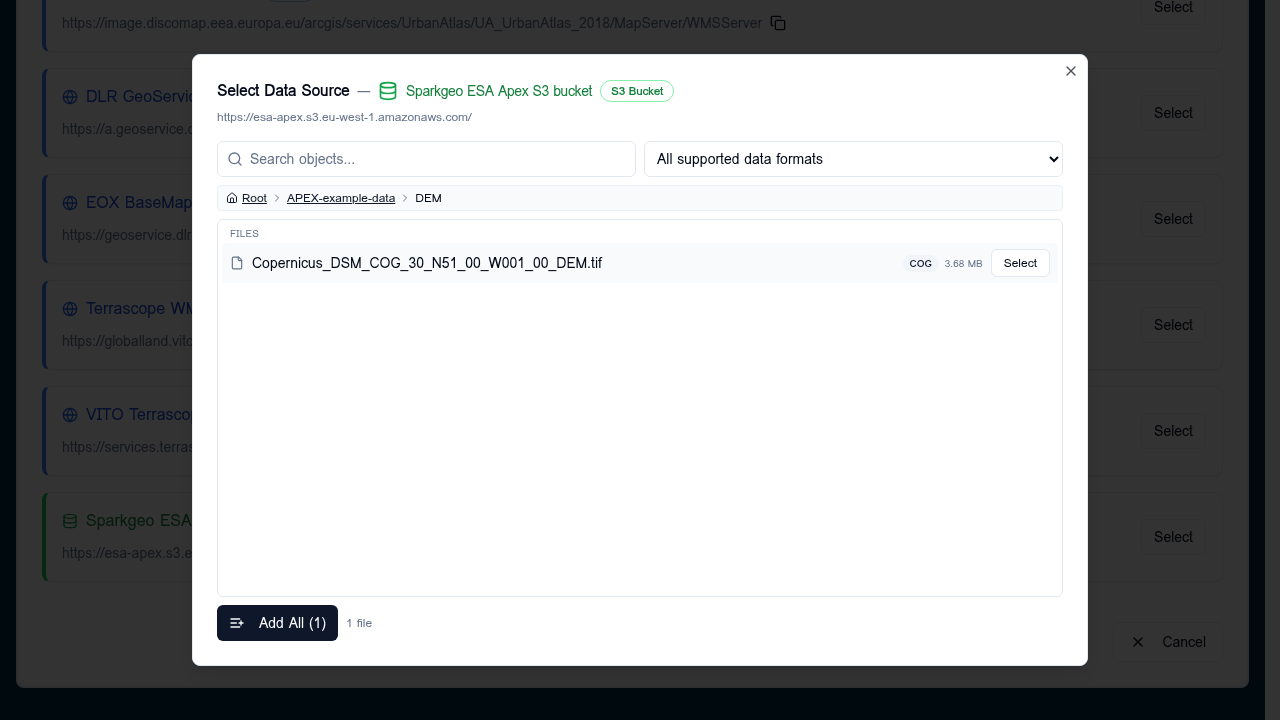
Pick From Service, choose your S3 service, then drill into the bucket
in the S3 browser. When the file's extension is .tif
the format is auto-detected as COG and the Select button activates.
Validation
- The healthcheck issues a HEAD/range request and confirms the file returns 200 and looks like a COG (internal tiles + overviews).
- Files >2 GB or with very many bands (hyperspectral) take longer to validate; the builder applies internal performance guards.
- If the COG is not actually cloud-optimised (no internal tiling) the layer may still load but render slowly.
Visualisation
After adding the source, pick a styling tool in the layer card:
- Single-band → Colormap (or Categories for discrete values).
- Multi-band → RGB composite, configured per source under the RGB composite section.
Tips
- Prefer COGs that have internal overviews; they are dramatically faster to render at coarse zooms.
- Files served from HTTP without range support will fail to load — host
COGs on S3, CloudFront, or any HTTPS server that honours
Range.